
한다 공부
[Web] JavaScript 본문
HTML을 이용해서 만든 웹페이지를, 사용자와 상호작용할 수 있도록 하기 위해 자바스크립트가 탄생했다.
<script>
지금부터 자바스크립트가 시작됨을 의미한다.
document.write('hello world'); 을 이용해 hello world등의 내용을 출력할 것이다.
<input type= "button" value="hi" onclick="alert('hi')">
버튼을 만드는데, 그 이름은 hi이고 클릭시 alert, 즉 경고문구가 뜬다는 뜻이다. 이 때 출력 문구는 hi 이다.
여기서 onclick은 이벤트이다. 클릭했을 때 어떤 사건이 일어날지 정한다. 속성은 반드시 자바스크립트가 와야한다.
비슷한 것으로는 상태가 변경되었을 때를 나타내는 onchange등이 있다.
아래는 버튼을 누르면 배경색이 바뀌는 코드이다.
night, day 버튼이 각 각 존재하고 night 버튼을 누르면 배경색이 검정색으로, day 버튼을 누르면 배경색이 흰색으로 변한다.
<!--night 버튼 클릭하면 검정 배경으로,
day 버튼 클릭하면 하얀색 배경으로 변경-->
<!DOCTYPE html>
<html>
  <head>
      <meta charset="UTF-8">
      <title>Web2 - JavaScript</title>
  </head>
  <body>
      <input type= "button" value="night" onclick="
      document.querySelector('body').style.backgroundColor='black';">
      <!--body 태그를 black으로 변경-->

      <input type= "button" value="day" onclick="
      document.querySelector('body').style.backgroundColor='white';">
      <!--body 태그를 white으로 변경-->

  </body>
</html>
Boolean
1===1
true
1===2
false
같은지 확인하는 비교연산자로 === 가 쓰인다.
1<2
true
= (1<2) less than의 의미로 lt가 사용된다.
아래는 조건문을 이용하여 하나의 버튼을 누르면 배경 색을 변경해주는 코드이다.
배경이 흰색일땐, night 버튼이 생성되며 버튼을 누를 시 배경이 검정색으로 바뀐다.
배경이 검정색일땐, day 버튼이 생성되며 버튼을 누를 시 배경이 흰색으로 바뀐다.
<!DOCTYPE html>
<html>
  <head>
      <meta charset="UTF-8">
      <title>Web2 - JavaScript</title>
  </head>
  <body>
      <input id="night_day" type= "button" value="night" onclick="
      if (document.querySelector('#night_day').value === 'night') {
        document.querySelector('body').style.backgroundColor='black';
        document.querySelector('#night_day').value = 'day';
      }
      else {
        document.querySelector('body').style.backgroundColor='white';
        document.querySelector('#night_day').value = 'night';
      }
      ">
  </body>
</html>
리팩토링
코드의 중복을 줄이고 비효율적인 부분을 수정해 유지 보수를 쉽게 하기 위한 작업을 의미한다.
위 코드에서 if 문 안의 조건이 자기 자신의 상태를 나타내므로 this를 사용할 수 있다.
document.querySelector('body') 부분 또한 중복이 되므로 변수로 담을 것이다.
var target = document.querySelector('body');
위 코드와 같은 동작을 하지만 훨씬 효율적인 코드를 만들 수 있다.
<!DOCTYPE html>
<html>
  <head>
      <meta charset="UTF-8">
      <title>Web2 - JavaScript</title>
  </head>
  <body>
      <input type= "button" value="night" onclick="
      var target = document.querySelector('body');
      if (this.value === 'night') {
        target.style.backgroundColor='black';
        this.value = 'day';
      }
      else {
        target.style.backgroundColor ='white';
        this.value = 'night';
      }
      ">
  </body>
</html>
반복문과 배열
본문의 글씨가 어두운 색일 때, 배경을 어두운 색으로 변경하면 글씨가 안 보이는 경우가 생긴다.
이를 반복문과 배열을 이용해 해결해보자.
<!DOCTYPE html>
<html>
  <head>
      <meta charset="UTF-8">
      <title>Web2 - JavaScript</title>
  </head>
  <body>
    <h1>어두운 모드</h1>
    <h1>밝은 모드</h1>
      <input type= "button" value="night" onclick="
      var target = document.querySelector('body');
      if (this.value === 'night') {
        target.style.backgroundColor='black';
        this.value = 'day';

        var hlist = document.querySelectorAll('h1');
        var i = 0;
        while (i < hlist.length) {
          hlist[i].style.color = 'powderblue';
          i++;
        }
      }

      else {
        target.style.backgroundColor ='white';
        this.value = 'night';

        var hlist = document.querySelectorAll('h1');
        var i = 0;
        while (i < hlist.length) {
          hlist[i].style.color = 'blue';
          i++;
        }
      }
      ">
  </body>
</html>
함수
익히 알다시피 효율성을 위해 함수를 사용한다.
즉 리팩토링을 위해 함수를 사용하는 것이다.
유지보수가 극단적으로 쉬워진다.
<!DOCTYPE html>
<html>
  <head>
      <meta charset="UTF-8">
      <title>Web2 - JavaScript</title>
      <!--this를 넘겨주고 self로 받음-->
      <script>
        function nightDayHandler(self) {
          var target = document.querySelector('body');
          if (self.value === 'night') {
            target.style.backgroundColor='black';
            self.value = 'day';

            var hlist = document.querySelectorAll('h1');
            var i = 0;
            while (i < hlist.length) {
              hlist[i].style.color = 'powderblue';
              i++;
            }
          }

          else {
            target.style.backgroundColor ='white';
            self.value = 'night';

            var hlist = document.querySelectorAll('h1');
            var i = 0;
            while (i < hlist.length) {
              hlist[i].style.color = 'blue';
              i++;
            }
          }
        }
      </script>
  </head>
  <body>
    <h1>어두운 모드</h1>
    <h1>밝은 모드</h1>
      <input type= "button" value="night" onclick="
      nightDayHandler(this);
      ">
  </body>
</html>
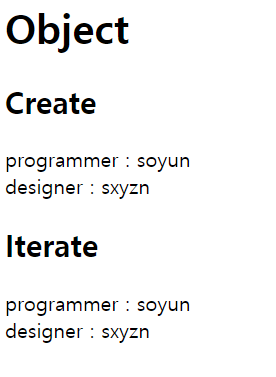
객체
이름이 있는 정리정돈 상자이다.
객채 생성은 아래와 같이 한다.
<!DOCTYPE html>
<html>
  <head>
    <meta charset="utf-8">
    <title></title>
  </head>
  <body>
    <h1> Object </h1>
    <h2> Create </h2>
    <script>
      var coworkers = {
        "programmer":"soyun",
        "designer":"sxyzn"
      };
      document.write("programmer : "+coworkers.programmer+"<br>");
      document.write("designer : "+coworkers.designer+"<br>");
    </script>

    <h2> Iterate </h2>
    <script>
      for (var key in coworkers) {
        document.write(key+' : '+coworkers[key]+ '<br>');
      }
    </script>

  </body>
</html>
정돈하기
<script> 안에 있는 내용을 colors.js 와 같은 별도의 파일로 분리시키고,
<script> 대신
<script src="color.js"> </script>를 사용을 한다면 유지보수가 더욱 쉬워진다. 서버 입장에서도 cache에 js파일을 담아두면 되기 때문에 이 방법이 더 효율적이다.
[참고자료] 생활코딩 WEB2 - JavaScript
'Dev > Web' 카테고리의 다른 글
| [Web] Cookie, Session (1) | 2023.05.13 |
|---|---|
| [Web] MySQL (0) | 2021.11.22 |
| [Web] Git (0) | 2021.11.02 |
| [Web] CSS (0) | 2021.10.12 |
| [Web] HTLM & Internet (0) | 2021.10.12 |
